 Setup Guide - Helpdesk Portal
Overview
This guide takes about 15 minutes. At the end of it you will have a working helpdesk: an address customers can email, tickets that arrive with an owner and a deadline, agents who can answer them, and a test ticket you have put through the whole flow yourself.
Work through the steps in order - each one builds on the last. You can stop after step 4 and still have something usable; steps 5 and 6 are worth doing before you tell customers about it, and step 7 is what stops go-live going wrong.
After you sign up for your helpdesk portal account, you can access the setup wizard via the link sent to
your email. Please check the spam folder if you have not received our email. Kindly add  to the safe sender list of your email account. After your
first time login to Raiseaticket, a guided wizard will assist you.
to the safe sender list of your email account. After your
first time login to Raiseaticket, a guided wizard will assist you.
Set up Raiseaticket
0 of 13 complete
Outcome: process and reply to your first support ticket.
Before you begin
- A Raiseaticket administrator account
- The support email address you already publish
- Access to that mailbox’s forwarding settings
- One colleague available to test with
- About 15 minutes
Part 1 · Quick start
Seven steps to a ticket you have answered end to end. You can stop here and the desk works.
- Done when: You can sign in to your admin console. how
- Done when: A colleague has an account and has signed in once. how
- Done when: Your agents are in it, and new tickets land there. how
- Done when: Mail to the address you already publish reaches the portal. how
- Done when: It becomes a ticket with a reference number. how
- Done when: An agent has answered it from the console. how
- Done when: The reply is in the inbox you sent from, not the spam folder. how
Part 2 · Prepare for launch
Worth finishing before you tell customers about it.
- Done when: The week matches when someone is actually working. how
- Done when: A new ticket shows a due time counted in those hours. how
- Done when: Your waiting statuses stop the clock. how
- Done when: Agents are told when a ticket arrives or a customer replies. how
- Done when: Two questions you already answer weekly are published. how
- Done when: You have published your support address. how
When all thirteen are ticked, you are live.
-
Sign up
Get Started: Signing into your Admin Console
After you have completed the signup process, follow the below instructions to set up the email and web ticketing system of the helpdesk portal.
All the below items are available in Raiseaticket's settings.
-
Work flow
-
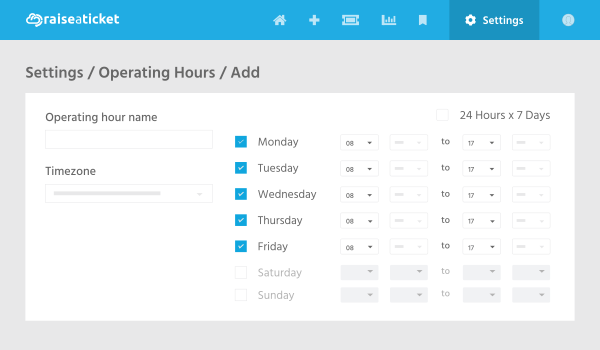
Operating Hours
By default, operating hours are set to eight hours, five days a week in the time zone specified in your organisation's profile. Add the hours when your agent or group is ready to support customers.
-
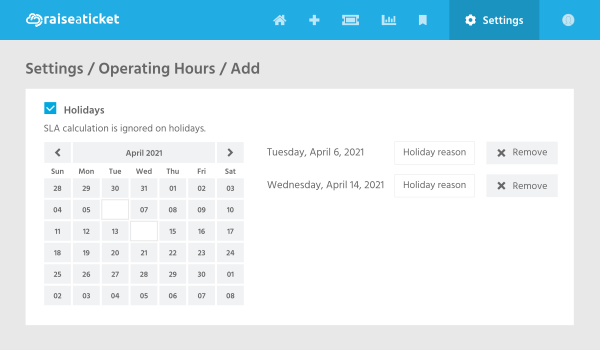
Holidays
Add Holidays to specify the dates and times when your team is unavailable.
-
-
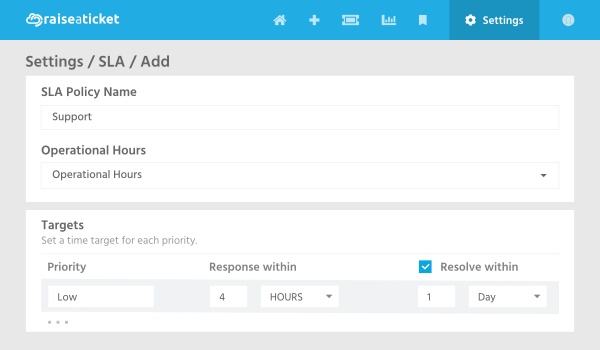
SLA
Add Service Level Agreements to define goals for your agent's performance and link to agent/group work schedules, operating hours, client agreements. Multiple SLAs can be set up based on the email id or domain following unique business hours. SLAs are used to ensure that the support team completes the ticket in a defined amount of time. You can define the pause condition of the SLA such as timer pause conditions as when you want any details from end users you can make the pause condition when the state is awaiting user reply. You can monitor the SLA statistics with our built-in advanced reports.
-
Ticket
-
Ticket Properties
Ticket ID A unique number assigned to every support request Subject A summary of the support request Priority Type of Impact of the ticket to the user Status / Flag Status of the support request as it progresses through the support system Category Classification of the ticket category (Problem, Incident, Question, Request) Description Detailed description of the support request User Contact details of the support requester or client Creation date Date and time the support request is submitted First and last Response Time of first and last reponses SLA Time left to Resolve or Respond -
Ticket Priorities
When creating a new SLA, there are four priorities: Low, Medium, High and Urgent. The priorities require first response time and resolution time to ensure optimized support for the tickets. The tickets are organized and prioritized based on business factors. The optimal prioritization method is different for each company and depends on several factors.
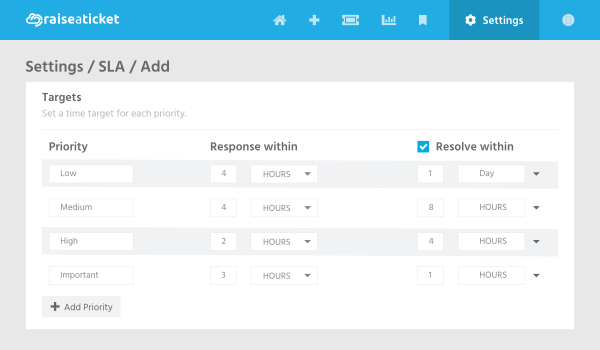
Your organization may choose to stick to one SLA or multiple SLA, or to change models when necessary based on business requirements. The focus of ticket prioritization should be to provide the most effective customer support for end users.
By default, we have added the below default SLA. Timings can be amended accordingly.
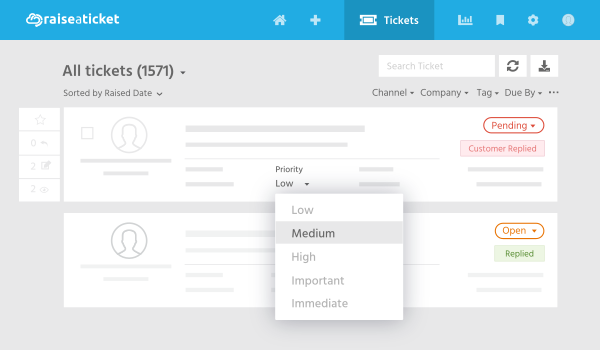
Priority Response Time Resolution Time Low 4 hours 1 day Medium 4 hours 8 hours High 2 hours 4 hours Urgent 1 hour 3 hours
-
-
Add Agents
Add your primary support person(s) or employee(s) who will respond to clients on a full-time or part-time basis. The agents would be invited to activate their account via email. An agent can be a member of one or more groups.
-
Add Teams (Groups)
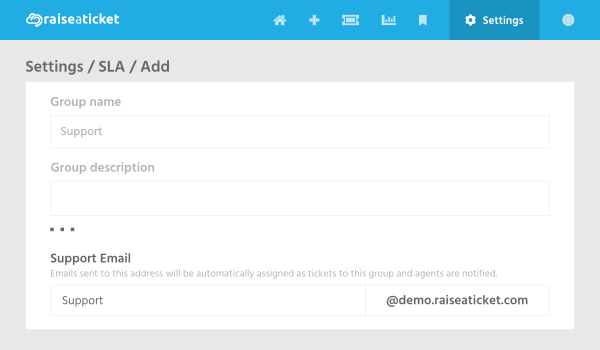
Add teams as groups to help your organisation classify the agents in the support system based on skills, expertise, clients, domain, SLA, operating hours and departments (like Sales, Billing, HR). An optional service email ID can be created and mapped for every group.
A support group is designed to group agents forming part of a function such as billing, technical, sales, etc. so that notifications and ticket viewing are consolidated. Teams or groups is the right mix and number of members, optimally designed for tasks and processes and promote positive dynamics. The group also defines the operating hours for agents.
-
Add Custom Ticket Status
The default ticket status values available in Raiseaticket are:
Open - A ticket that has been opened by an agent or client. The first response time is calculated from the timestamp the ticket is created.
Closed - A ticket that is closed and on which no work is being done and acknowledged by the client for closure. The resolution time is calculated from the timestamp the ticket is created until the timestamp the ticket is closed.
Pending - The ticket is awaiting a response from another vendor, admin or developer, not the client or agent. The on-hold time is added to the client's wait time and not agent's wait time. Pending is set where there is no predictable estimated time for a reply.
In Progress - A ticket on which work is currently being done.
Resolved - A ticket on which work has been finalised and assumed as solved by the agent.
Re-opened - A ticket which has been re-opened.
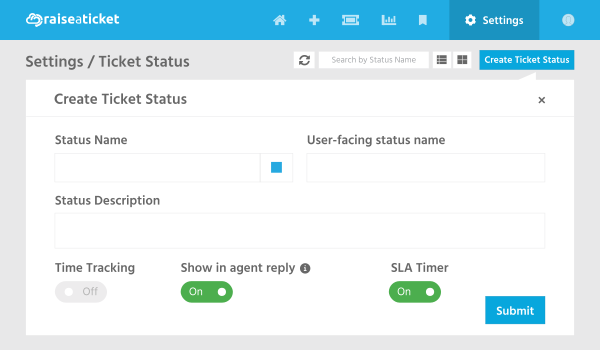
The above standard ticket statuses cannot be edited; however, you may wish to add further statuses to fit your requirements.
Awaiting Customer Response - A ticket is waiting for a reply or action from the client.
Awaiting 3rd Party Response - A ticket is waiting for a reply from a vendor, developer or service provider for an approval. The agent contacts the 3rd party and gets the approval for the client's request and updates the ticket.
The above two statuses are editable and could be enabled/disabled based on your requirements.
-
-
Channels
Communication is the key to your business success. Set up the popular channels for your customers to reach you such as web, email, etc.
-
Web Ticketing
Collect support requests directly on the web portal. This helps your organisation improve productivity by responding to customers faster. You could redirect your support link (https://helpdesksitename.raiseaticket.com) and refer your customers to use the self-service portal for service requests.
-
Email Ticketing
After you have completed the signup process, you will be assigned with an email address like [email protected]. Your customers could directly open support requests by emailing eg:[email protected]. You can add additional or alternative email addresses for submitting tickets under Settings/Groups.
In order to receive support requests to your existing email address or to an external email address, you need to forward the emails received to the support email address of your Raiseaticket portal.
Email forwarding process differs from provider to provider. Please follow the below instructions:
-
Microsoft 365 (Exchange Online / EOP)
-
Tenant Allow/Block List (defender portal)
Sign in to the Microsoft Defender portal at https://security.microsoft.com.
Navigate to Email & collaboration › Policies & rules › Threat policies.
Under Anti-spam policies, open the Default inbound policy, click Edit allowed and blocked senders and domains, and add:
Domain: yourdomain.raiseaticket.com (or simply raiseaticket.com)
or Email: [email protected]
Save your changes.
-
Mail-flow rule (transport rule) – recommended
In the Exchange Admin Center, go to Mail flow › Rules and click + to Create a new rule.
Name it “Whitelist Raiseaticket”.
Under Apply this rule if…, choose The sender domain is and enter raiseaticket.com.
Under Do the following…, select Modify the message properties › Set the spam confidence level (SCL) to… and enter -1 (bypass spam filtering).
Save your changes.
This uses the Tenant Allow/Block List to bypass EOP filtering for that domain/email. Microsoft Learn
This approach gives you granular control—only bypassing spam filtering while still honoring SPF/DKIM/DMARC.
-
-
Google Workspace (Gmail)
Sign in to the Admin console at admin.google.com (with a super-admin account).
Go to Apps › Google Workspace › Gmail › Spam, phishing, and malware.
Scroll to Email allowlist (aka Approved senders) and click Configure.
Add either:
Address: [email protected]
Domain: raiseaticket.com
Click Save.
Messages from that address/domain will now bypass Gmail’s spam filter. Google Help
(If you need even finer control, you can also create a Content Compliance or Routing rule in the same Gmail settings to bypass spam for that domain.)
-
Integration with Microsoft 365 mailbox
For organizations that want a fully unified support workflow, Raiseaticket’s Premium Microsoft 365 Integration links your Exchange Online mailboxes directly to the ticketing platform—eliminating manual forwarding, reducing delays, and keeping all correspondence in one place. Below is a more detailed overview of what’s involved and how to get set up. Microsoft 365 Integration
This seamless integration, paired with our advanced ticketing software, elevates customer service, streamlines support, and keeps your business ahead by exceeding customer expectations.
Want to learn more? Contact our support team for personalized assistance and get started today!
-
-
Agents
Add your primary support person(s) or employee(s) who will respond to clients on a full-time or part-time basis. The agents would be invited to activate their account via email. An agent can be a member of one or more groups.
-
Self-help
Create articles to build a knowledge base repository for how-to, troubleshooting and procedural information with the knowledge base feature. Keep the content searchable, organized, and relevant, this helps clients to easily find the information they require. Publish the FAQ for your clients on your free Raiseaticket helpdesk portal which empowers end-users to resolve their own issues in their own time is a worthy long-term benefit for the remote support future.
-
Notifications
-
Email Notifications
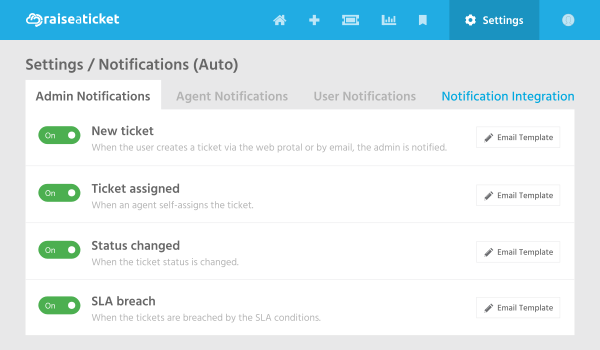
Instant notifications keep agents, clients, and admins immediately aware of new responses and ticket updates. raiseaticket.com has enabled notifications for all rules to ensure timely awareness. You may choose to disable certain notifications to tailor alerts to your business requirements.
-
Notifications Integration
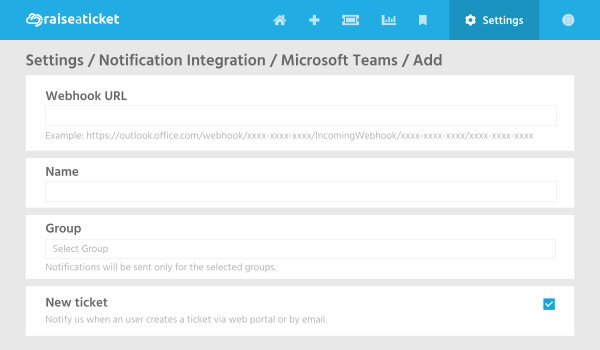
Integrate real time notification by messaging the support team in Microsoft Teams and Slack.
-
-
Test it before you invite customers
Ten minutes here saves the awkward first week. Send yourself a real ticket and follow it the whole way through, the way a customer would.
-
Send a ticket in from outside
From a personal address that is not an agent account, email your support address. Within a minute or two it should appear in the ticket list with a reference number, and the sender should receive an automatic acknowledgement. If nothing arrives, work through why emails are not becoming tickets.
-
Check the customer actually receives your reply
Answer the ticket from the agent console and confirm the reply reaches the inbox you sent from, not its spam folder. This is the most common thing to be wrong on day one and the one customers notice first. If the reply is missing or flagged, work through why customers are not receiving replies before going any further.
-
Confirm the clock and the queue
Open the ticket and check three things: it has a priority, it shows a due time that matches your operating hours rather than counting overnight, and it sits in the right group. If the due time looks wrong, the SLA policy is running on calendar hours instead of your working week.
-
Try it as an agent who is not you
Sign in as one of the agents you invited. They should see their group’s tickets and nothing else. Have them reply once, so you know their account works and the notification reaches them before a real customer is waiting.
-
Close the loop
Resolve and close the test ticket, then reply to it from the customer side. A closed ticket that receives a reply should reopen by itself. Once that works the flow is proven end to end, and you can publish your support address.
-
Troubleshooting
The six things that most often stop a new desk, and what each one usually means.
- Activation email not received
- Check the spam folder first, and add the Raiseaticket no-reply address to your safe senders. You can request the activation link again from the sign-in page.
- Email did not create a ticket
- Usually the forwarding rule, an address nothing is listening on, or the monthly ticket allowance. Full checks
- The agent was not notified
- Notifications are configured per action, so ticket-created mail can work while assignment or reply notifications are off. Check the agent is in the group the ticket landed in, and that their own mail is not filtering it.
- Customer did not receive the reply
- Most often it was added as a private note rather than a public reply. Full checks
- The same ticket was created twice
- Normally a forwarding loop: two rules forwarding the same message, or a mailbox that forwards to the portal while also receiving the portal's own replies. Forward directly, along one path only. Full checks
- The SLA timer looks wrong
- Check the policy is using your operating hours rather than calendar hours, that the ticket's priority maps to the target you expect, and that a waiting status has not paused the clock. Full checks
You are Ready to Support Your Customers on the free Raiseaticket helpdesk portal.
Your test ticket has been through the whole flow, so the desk is ready for real ones. Publish your support address, or forward the address you already use to it.
Three things worth doing in your first week:
Hand the agent guide to your team
The agent guide covers the day-to-day work: picking up a ticket, replying, and closing it.
Publish two or three knowledge base articles
Start with the questions you already answer every week. See knowledge base.
Decide your priorities and ticket flow deliberately
Rather than letting them settle by default. The ticket handling workbook builds a policy you can hand to the team.
Anything not covered here is in the FAQs.
Related resources
Technical Configuration FAQs:
How do I whitelist Raiseaticket email domains?
Ensure seamless email communication by adding Raiseaticket's email domains to your whitelist. This prevents important notifications from being flagged as spam.
What are the system requirements for Raiseaticket?
Raiseaticket is a cloud-based platform that works on any modern browser. No special system requirements are needed.
How to add Multifactor Authentication to my helpdesk portal?
Admin, agents, and users can set up Multifactor authentication via the Google authenticator app. Multifactor authentication can be enabled on the profile settings. Before you can enable MFA for the helpdesk portal, you'll need to install the Google Authentication app on your smartphone or tablet device.
Can I customize the ticket numbering format?
Yes, ticket numbering can be customized in the premium version to align with your organization's workflow.
How do I set up email filters for ticket creation?
Create rules in the Email Channels section to filter and prioritize whitelist email domains for automated ticket creation.