 Agent Guide
When an agent signs into Raiseaticket helpdesk portal they can see their dashboard or tickets panel based on the assigned agent rights. Here they can initiate various actions. The top of the interface displays the helpdesk name as well as the main menu bar. The menu bar has tabs to move and perform multiple functions
The dashboard is the home page which will appear after logging in. It shows a quick summary of ticket statistics, which will be updated every hour.
A ticket is a customer request raised to seek help in resolving issues on services, products, quotes etc. Agent can add or create a ticket on behalf of end users.
Shows all tickets so that agents can interact with tickets and add notes to the tickets. Every ticket action is performed from the tickets lisiting page.
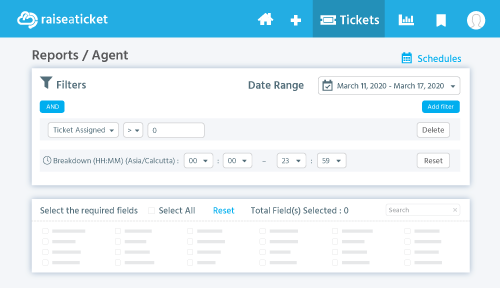
Reports help agents to gain a deep understanding of their key performance goals in relation to response and resolution of tickets by choosing from the array of metrics and filters.
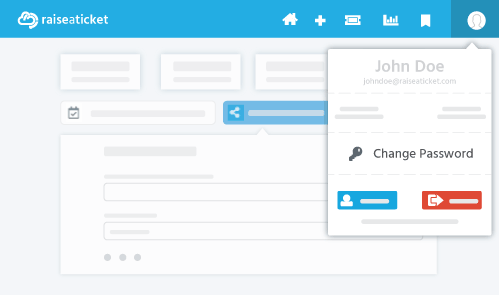
Displays agent name and profile picture. The agents can customize their profile in the profile settings. Customization includes uploading a profile picture, change password, adding timezone and multifactor authentication.
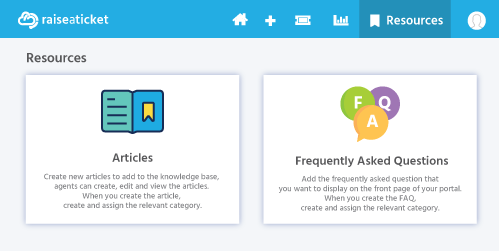
Built-in Knowledge base tool for the agents in order to access the Articles and Frequently asked questions (FAQs). These help in analyzing and solving issues in a fast pace and encourage them to collaborate, share knowledge and solve problems.
In the dashboard, the area below the top menu bar shows the overviews of the tickets counts for quick access
Assigned: The number of tickets assigned to an agent.
Resolved: The total number of tickets resolved by the agents.
Unresolved: The unassigned tickets and tickets which are open, in progress, pending, awaiting customer response and awaiting third party response are categorized as unresolved.
Unassigned: The tickets which are not assigned to the agents for further action or support process.
Pending: The number of unresolved tickets with pending ticket status.
Overdue: The tickets which have beached the SLA timers for response or resolution.
Due today: These tickets will breach SLA in case not actioned today.
Due tomorrow: The number of tickets in open status and yet to be responded to or resolved within the next day.
In the agent dashboard page, below the overall counts of tickets, there are menus such as
Date Range
Date Range option helps to view the information of the tickets for the selected duration. By default, the present day will be in selection.
All Groups
In the agent dashboard page, viewing of the ticket statistics are only based on groups, either by all groups or a selected group in which the agent belongs.
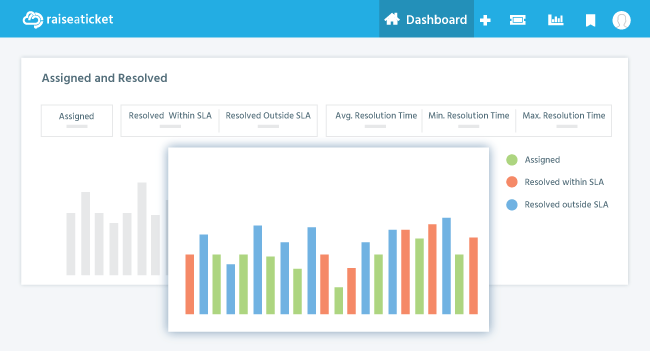
In the dashboard, this widget will display an agent the number of assigned and resolved tickets in the form of a graph.
Assigned – The total number of tickets assigned to an agent.
Resolved within SLA - The total number of tickets resolved within the SLA hours.
Resolved outside SLA - The total number of tickets resolved after SLA hours passed.
Resolution time - The time tracked between the ticket creation and the time of the final status change to resolved or closed.
In the dashboard, this widget will show the number of responses made by a user and an agent in their assigned tickets. This data can be viewed in the form of a graph.
User responses - The total number of users replies in tickets.
Your responses - The total number of agents replies in tickets.
First responses - The total number of times an agent made the first reply to a ticket after the ticket was created.
First Response time - The duration between the timestamp of when a ticket is created and the timestamp of the agent’s first reply on that ticket.
Average 1st response time – The total amount of average time taken by the agents to make the 1st response to the tickets.
Minimum 1st response time – The total amount of minimum time taken by the agents to make the 1st response to the tickets.
Maximum 1st response time – The total amount of maximum time taken by the agents to make the 1st response to the tickets.
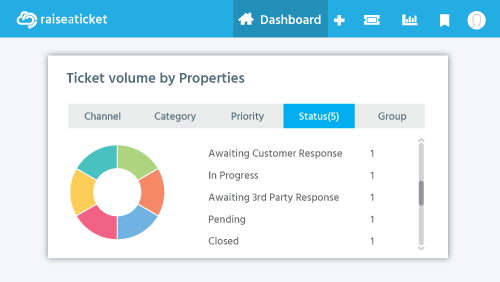
In the dashboard, this widget will show the volume of tickets assigned and handled by an agent based on properties such as
Channel - The total volume of tickets raised via Portal and Email.
Category - The total volume of tickets based on the types of ticket requests or problems.
Priority - The volume of tickets based on ticket importance.
Status - The total volume of tickets based on each ticket status.
Group - The total volume of tickets in each group of the agent.
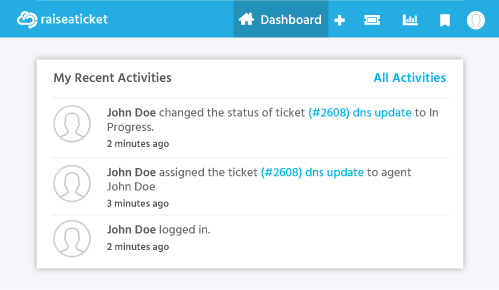
This widget in the agent dashboard page provides information about recent activities carried out by the agent in the helpdesk portal along with a separate view of all activities carried out by the agent in the helpdesk portal. The activity logs show the information about what and when the actions are made by the agent.
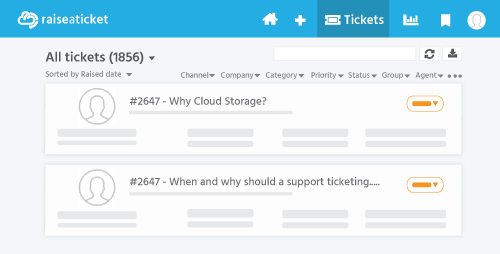
In the ticket listing page, you can view the list of tickets raised by users, yourself and tickets created by you on behalf of an end user. This includes
Unassigned tickets (if admin enabled)
Tickets assigned to you
Tickets assigned to your group and group agents.
You can also use the multiple built-in-overviews to view tickets. In the top left corner of the tickets listing page you will find overviews which help you to move between various views to easily find specific tickets. The tickets can be viewed at all stages of the ticket life cycle. These stages provide meaningful insight into the ticket's progress through the lifecycle.
The Admin assigns the new ticket to you.
You can assign yourself to an unassigned ticket.
When the ticket is assigned to you, the ticket is locked to prevent other agents from editing. However, other agents can still view the ticket.
You are also able to reassign the tickets to other agents. Sometimes, if a ticket is complicated it will require escalations between multiple agents before it can be closed. In such cases, a colleague may assign a ticket to you (or vice versa) for the resolution of the issue.
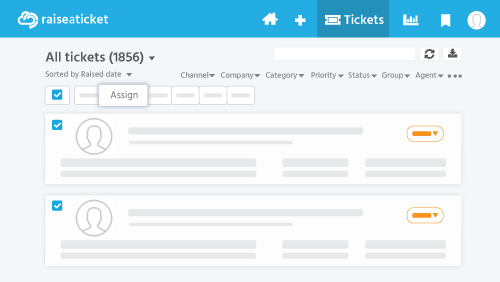
Reply: When the ticket is assigned to you, then you are able to reply to the ticket by clicking reply. In the reply you can add both CC and BCC.
Notes: You can add both private and public notes on the ticket.
Public notes: The public notes will be visible to all agents and admins
Private notes: You can select the person whom you want to see the notes
Approval: If you want to get approval from a third party for that ticket, you can click the approval and enter the approval user email and the content and click submit. You can also include the ticket conversations for the third party by selecting the “include conversation” checkbox.
Attachments: You can also attach a file to the ticket reply. It is not recommended to exceed a 25MB attachment size.
Replies and notes: You are able to view the replies and notes in the ticket and all the activities carried out in the ticket.
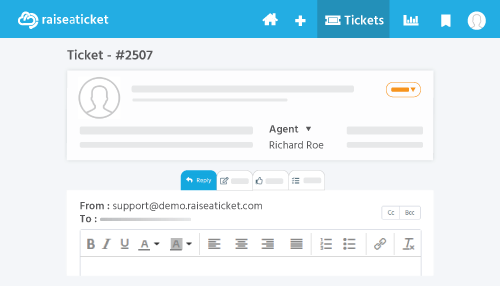
How to Display Only the Agent’s Name in Ticket Replies
Effective communication is crucial for managing customer interactions in Raiseaticket. To maintain consistency and professionalism, agents can ensure that only their name appears in ticket replies. This article provides a step-by-step guide on how to enable and verify this setting.
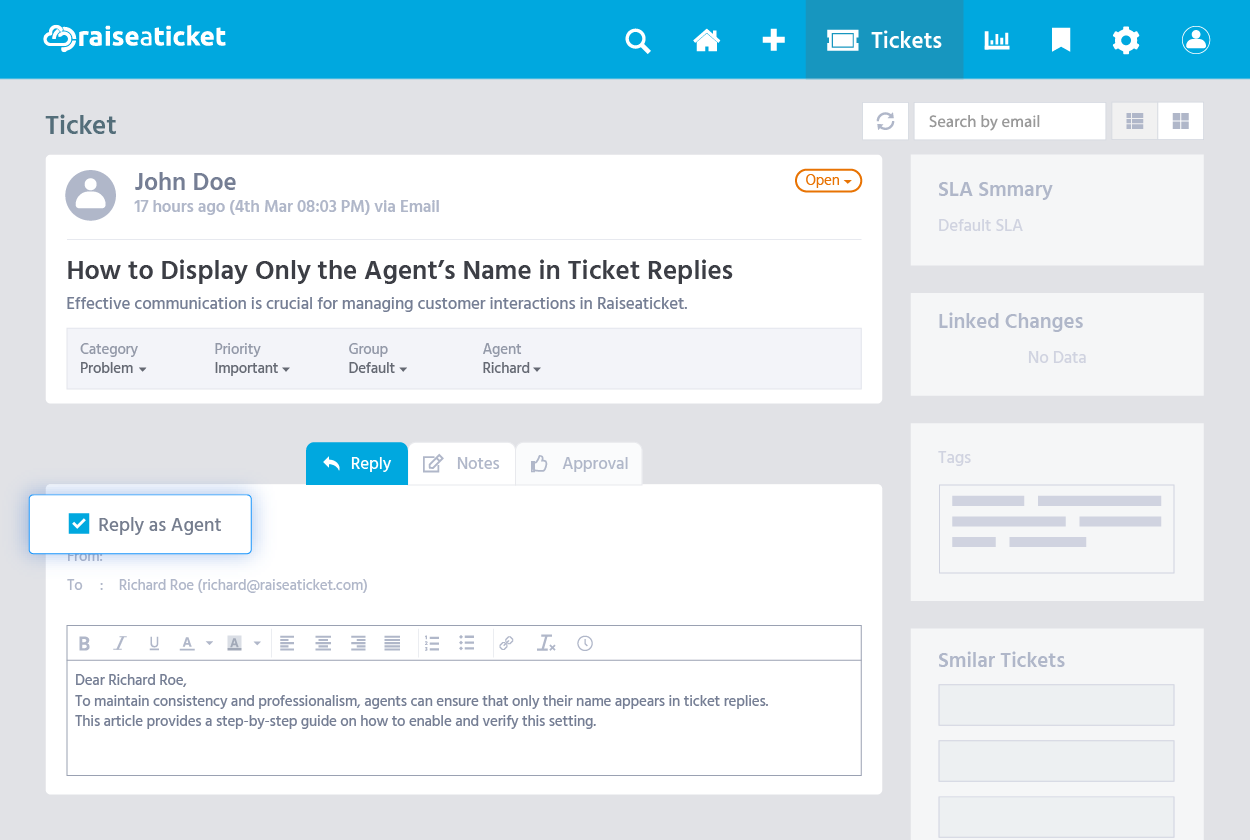
Step 1: Locate the "Reply as Agent" Option
The Reply as Agent feature in Raiseaticket ensures that responses are sent under the agent’s name rather than a generic or system-generated one.
Open the ticket reply editor in Raiseaticket.
The Reply as Agent option is enabled by default to streamline communication.
Step 2: Ensure the Setting is Enabled
To confirm that the agent's name appears in ticket replies:
Check that the Reply as Agent option remains enabled in the reply editor.
If the setting is disabled, toggle it back on to maintain consistency in communications.
Effect on Communications
When the Reply as Agent option is enabled, it impacts how the agent’s name appears in various interactions:
Outgoing Emails: The agent's name is displayed as the sender in all emails sent to end users.
Forum Posts & Comments: Any comments or posts made by the agent on forums reflect their name.
Ticket Details: End users only see the assigned agent’s name when viewing ticket details.
By keeping this setting active, agents can provide a clear, personalized, and professional customer support experience.
When a ticket is created, it is automatically assigned the status of “Open”. Also, an envelope icon is indicated on the ticket listing console to signify the ticket as New. The first response time is calculated from the timestamp of when the ticket is created.
Afterwards, you can set different ticket statuses based on the ticket conversations and progress. While replying to the ticket you can click the submit in the reply of the ticket to submit and set the ticket status. You can also change the ticket status in the top right corner of the ticket.
There are 5 default ticket statuses and 2 custom ticket statuses which you can apply to a ticket reply, they are
Submit and set as open
Submit and set as closed
Submit and set as pending
Submit and set as in progress
Submit and set as resolved
Submit and set as awaiting customer response
Submit and set as awaiting 3rd party response
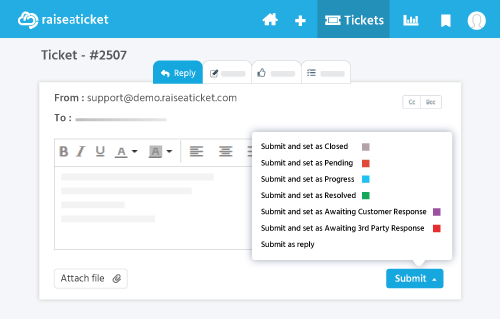
While you are actively working on a ticket you should set the ticket status to in progress.
Pending status: The ticket is awaiting a response from another admin or developer, not the client or you. The on-hold time is added to the client's wait time and not your wait time. On-hold is set where there is no predictable estimate time for a reply.
After you reply you may require further details from the customer, in this case you should change the ticket status to Awaiting Customer Response.
If you need assistance and/or get approval for the client’s request from a third party (such as a supplier) set the status to Awaiting 3rd Party Response.
If the customer replies, they may require further assistance from you. A "Replied" envelope is displayed on the ticket in this instance. If the customer does not require further assistance, mark the ticket as resolved.
The ticket is automatically closed after resolving the ticket. You can also set the ticket status as closed after resolving. The resolution time is calculated from the timestamp when the ticket is created until the timestamp when the ticket is closed.
If there is a requirement to update the ticket at some point after its initial closure, the ticket can be reopened.
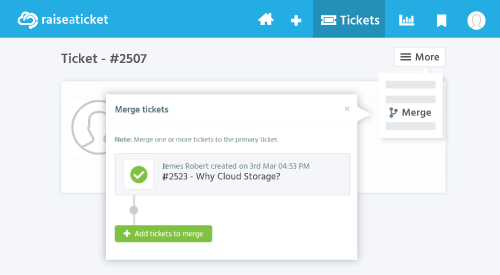
You can merge tickets into a single ticket. This happens when two or more support requests are created about the same issue from a client. The requester of the tickets to be merged is added in the CC of the merged ticket. To merge tickets, click the ticket you want to merge and click more options in the top right corner, then select merge. A box will open prompting you to choose which tickets to merge.
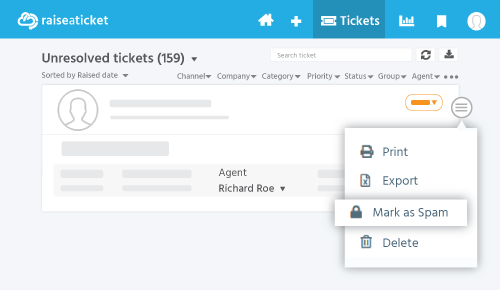
You can mark either individual tickets or bulk tickets as spam. if you are the group leader you can mark tickets in your group as spam. By marking a ticket as spam, you could block the user from sending further tickets or move the selected tickets to the spam folder. You may still receive messages from the same domain in the future. Only Admin has the access to spam the whole ticket.
To spam an individual ticket
In the ticket listing page move the cursor towards the ticket. Click the popup icon that appears in the right corner of the ticket and then select Mark as spam or,
Click the ticket you want to mark as spam and click more options in the top right corner and then select Mark as a spam.
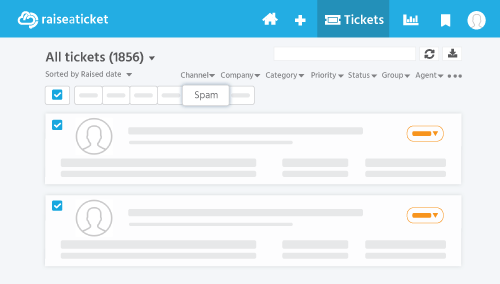
To mark tickets as spam in bulk
In the tickets listing page move the cursor towards the ticket a checkbox appears in the left corner select the checkbox a list of option appears in that select spam.
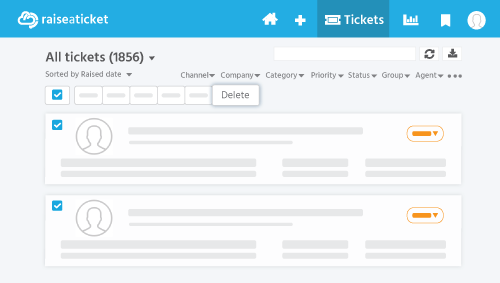
Tickets can be deleted either individually or in bulk. You can delete your tickets and the tickets of your group if you are a group leader. The tickets will be moved to the trash. Tickets in the trash will be automatically deleted in 30 days.
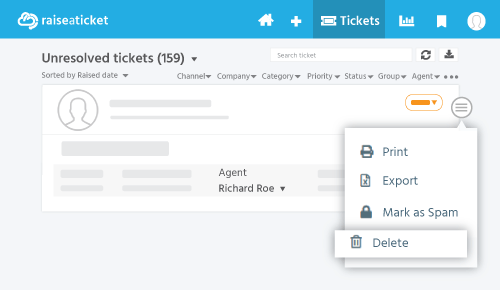
Delete one ticket
In the page listing the tickets, move the cursor over the ticket. Click the popup icon that appears in the right corner of the ticket and then select Delete or,
Click the ticket you want to delete and click more options in the top right corner and then select Delete.
Delete multiple tickets (bulk action)
In the tickets listing page move the cursor towards the ticket a checkbox appears in the left corner, select the checkbox; a list of options appears, in that select delete.
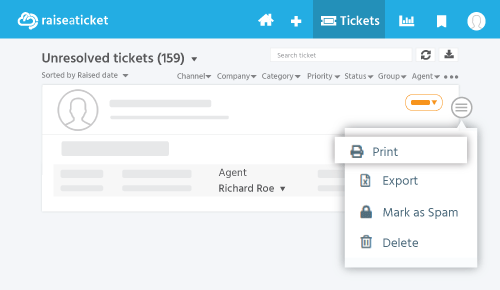
You can only print tickets individually individual ticket only, there is no option to print in bulk.
To print the ticket
In the page listing the tickets, move the cursor over the ticket. Click the popup icon that appears in the right corner of the ticket and then select Print or,
Click the ticket you would like to print and click more options in the top right corner, and then select Print.
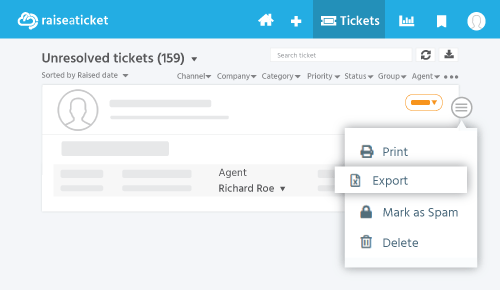
You can either export tickets individually or in bulk.
Export one ticket
In the page listing the tickets, move the cursor over the ticket. Click the popup icon that appears in the right corner of the ticket, then select export. A dialogue box appears stating Export Tickets, select the information you need to export and then click download.
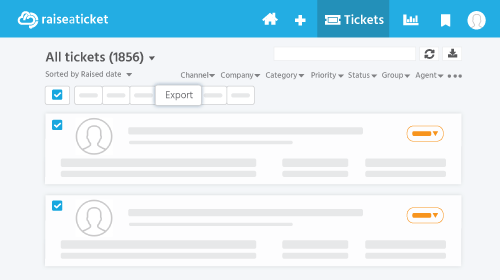
Export multiple tickets (bulk action)
In the page listing the tickets, move the cursor over the ticket, a checkbox will appear in the left corner. Select the checkbox, form the list of options that appear select “export”, this will prompt a dialogue box to appear. Select Export Tickets and choose which information you need exported. Click download.
Export ticket replies
Export replies by selecting more options on each ticket. To export, click the ticket you want export, click more options in the top right corner and then select export.
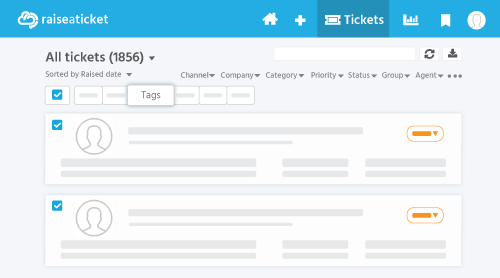
You can add tags to tickets individually or in bulk.
Condition
You can add tags to the tickets created by yourself.
You can add tags to your assigned tickets.
If you are a group leader you can add tags to your group tickets.
To add tags for individual tickets
Add tags to a ticket by selecting the required tickets on the page displaying the tickets. Once you are in the main screen of the required ticket, the Tag option is available on the right side of the screen, here you can add the available tags to the ticket.
To add tags to tickets in bulk
In the page that displays the tickets place the cursor towards over the ticket, a checkbox will appear in the left corner, select the checkbox, a list of options will appear. Select Tags and add accordingly.
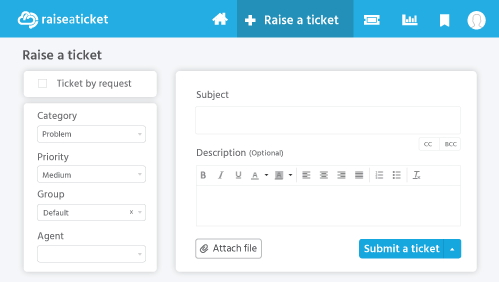
You can create a ticket on behalf of an end user. It triggers the following events
The end user receives a notification that a ticket was created on their behalf
The ticket appears in the end user’s tickets listing.
You can also create a ticket for your internal purposes.
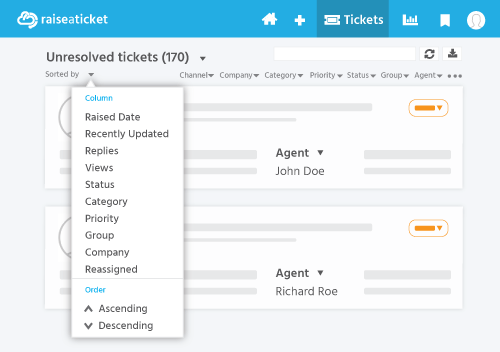
Below the built-in overviews have the option to sort, with the help of this feature agents are able to sort out their tickets according to their convenience for easy access.
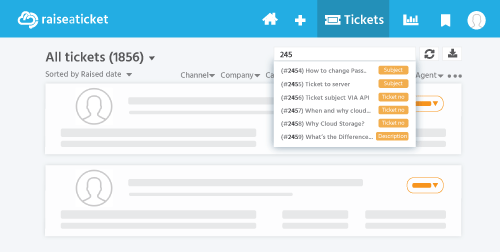
Raiseaticket has a sophisticated search feature to easily pull up a particular ticket in an efficient manner, below outlines the search functions
Search tickets quickly and easily with the help of simply searching for keywords in text form in the “search ticket” box.
In case if you are looking for an older ticket, use the advanced search bar to find the tickets with various filters available.
You can generate your custom report by adding filters and selecting required fields in the report page. You can download the generated report as excel or you can send the report to desired email.
You can also schedule your report to run daily, weekly, monthly. You can automatically send the reports to you, colleagues and desired email.
You can create, edit, and view the articles for your Self-help and others.
You can also create, edit, and view the Frequently asked questions (FAQs) for your Self-help and others.
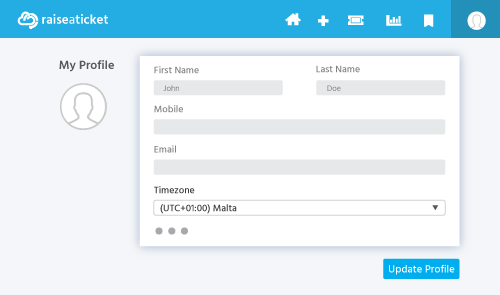
You can set the time zone by clicking on the agent profile located in the upper right corner of the support agent interface and then click My profile. Select the time zone from the drop-down list of time zone in my profile.
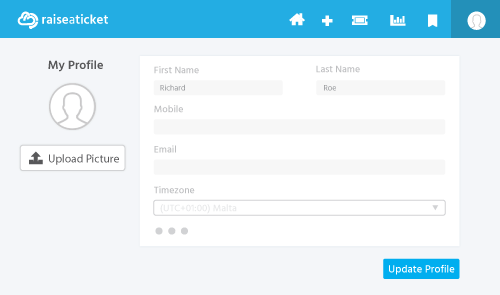
You can add a profile picture for added customization. Start by clicking on the agents name to access the agent profile, located in the upper right corner of the support agent interface. Then click My profile. Click upload picture on the left side of my profile.
If you would like to change the password, you can easily do so in the agent profile settings. Start by clicking on the agent profile located in the upper right corner of the support agent interface. Click change password, enter the new password and click update password.
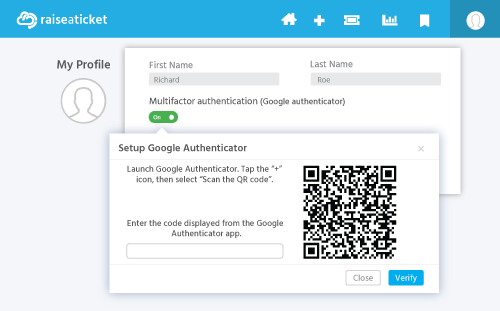
To enable and set up multifactor authentication (Google Authenticator)
Within the Raiseaticket support agent interface, click the agent profile located in the upper right corner and then click My Profile.
In My profile turn on the multifactor authentication.
A popup window appears “Set up Google Authenticator” with QR code.
Ensure you have the Google Authenticator application downloaded onto a compatible device (instructions below). within the app a 6-digit passcode will be generated. Enter this 6-digit Passcode generated by the Google Authenticator app and then click the verify button.
If you lose your device or otherwise can't get codes via the Google Authenticator, you can use backup to sign in. You can generate a set of 5 codes whenever you want. After generating a new set, the old set of codes will be automatically inactive.
To generate the passcode
Install and launch the Google Authenticator App on your Smartphone or tablet device.
Tap the + icon, then select Scan the QR code.
Scan the QR code displayed in the setup of google authenticator in the Agent profile.
The Passcode will be generated in the google authenticator app.
Copy and save the generated passcode.
When a user creates a ticket via the portal or email. This notification is sent to all agents.
When the ticket is assigned to an agent.
When the agent self-assigns the tickets.
When a ticket is assigned to the group, the group agents are notified.
Agents are notified regarding their assigned tickets on each user reply.